How to Overlay a Picture on a Video in CapCut 2025
How to Overlay a Picture on a Video in CapCut Complete Guide (2025)
CapCut is one of the most popular video editing apps in 2025 because of its easy to use interface and professional features. One of the most common questions beginners ask is:
How to overlay a picture on a video in CapCut? This technique is essential for creating reaction videos memes tutorials vlogs or cinematic edits.
In this article we’ll cover step by step instructions tips and tricks to perfectly overlay any image on your video using CapCut without losing quality.
Where Can I Find Trending CapCut Overlays?
If you are looking to add trending CapCut overlays to your main video in CapCut look no further than Content Creator Templates.
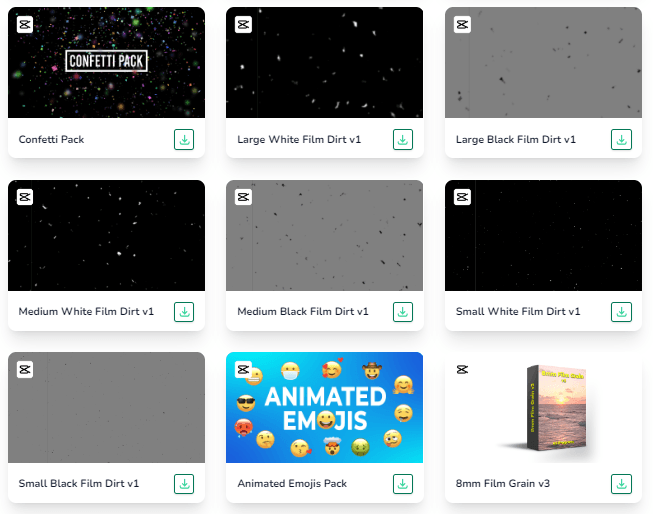
We’ve got hundreds of trending CapCut overlays and background videos which you can gain unlimited access to with a monthly subscription.
Using pre made trending overlay videos is a simple and easy way to stand out in the sea of content being produced on social media and short form platforms.
What Does Overlaying a Picture Mean?
Overlaying a picture on a video means placing an image on top of your video timeline. This can be used for:
Adding a logo or watermark to protect your content.
Inserting stickers memes or reaction images.
Creating tutorials with step by step screenshots.
Designing cinematic edits with photo layers.
CapCut makes this process and effective even for beginners.
How to Overlay a Picture on a Video in CapCut Mobile Version ?
Follow these simple steps:
Step 1: Install and Open CapCut
Download the latest version from the Play Store or App Store.
Open the app and tap New Project.
Step 2: Import Your Video
Select the video you want to edit from your gallery.
Tap Add to load it into the timeline.
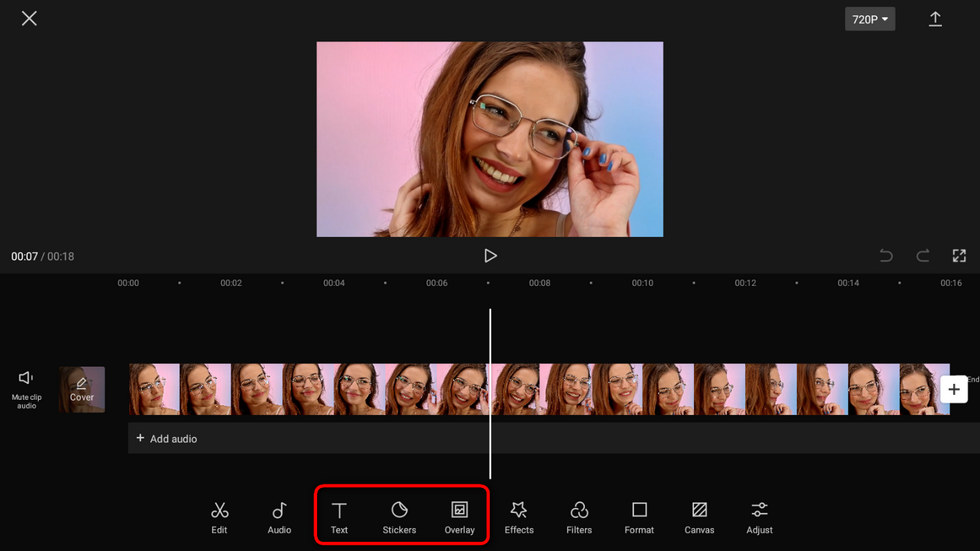
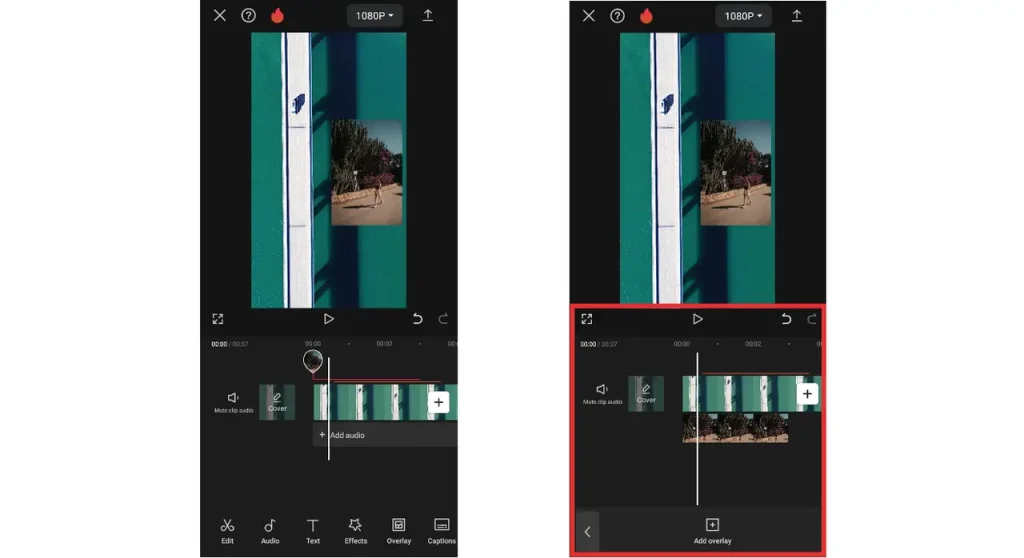
Step 3: Add Your Picture as an Overlay
Tap the Overlay button found at the bottom toolbar
Select Add Overlay.
Choose a picture you want to overlay and tap Add.
The image will now appear as a separate layer on top of your video.
Step 4: Resiz the Image
Pinch and drag the image to adjust its size.
Move it anywhere on the screen corner for watermark center for tutorials etc.
Step 5: Adjust Duration
Drag the image layer edges to match how long you want it to appear in the video.
You can make it last for the entire video or only a specific scene.
Step 6: Add Effects (Optional)
Tap on the image layer to add:
Animation fade in fade out,slide etc.
Filters to match video colors
Masking and Blending for cinematic looks
Step 7: Export the Video
Once satisfied,tap the Export button at the top right.
Choose your desired resolution 1080p or 4K recommended
CapCut app features
CapCut is more than just an overlay tool its a powerhouse of features that turn your video projects into works of art. From multi layer editing to animation effects this app has everything you need to create videos that captivate and entertain. Lets dive into some standout features that make CapCut the ultimate tool for bringing your creative visions to life.
Multi-layer editing
CapCut take editing to another level with its multi layer editing feature. You can overlay multiple pictures videos and audio tracks in one project. Imagine creating a video that has a beautiful image overlay and includes text,stickers and even your voiceover all layered together for that perfect effect. Its like painting with multimedia allowing for complex rich and dynamic video creations that stand out.
How to Overlay a Picture on a Video in CapCut PC/Desktop Version
CapCut PC also supports image overlays with more precision:
Download CapCut Desktop for Windows or Mac.
Import your video and image files.
Drag the video to the main timeline and the image to the overlay track above it.
Resize, move and adjust the opacity or blending modes.
Export your final edit in high resolution.
FAQs
1. How do you add multiple picture overlays to a single video?
In CapCut tap on Overlay and select your first picture. After adjusting it tap Overlay again to add another photo. Repeat this process for as many overlays as you need. CapCut allows you to layer multiple images offering creative flexibility in your video editing.
2. What blend modes are available for picture overlays?
CapCut offers several blend modes for picture overlays including Screen and Multiply Overlay and more. These modes adjust how your overlay interacts with the video beneath it allowing for creative effects like blending colors enhancing brightness or creating shadow effects giving your video a unique look.
3. Is there a limit to the duration a picture overlay can appear in a video?
No there no set limit In CapCut you can adjust the duration of your picture overlay to cover the entire video or just a specific part. Drag the edges of the overlay on the timeline to shorten or lengthen its appearance according to your creative vision.
4.How does CapCut ensure the exported video maintains high quality?
CapCut uses advanced compression algorithms to ensure your video maintains high quality upon export. You can choose the resolution and bitrate before exporting giving you control over the balance between file size and qualit It ensures that your video looks sharp on any platform.
Conclusion
Bringing pictures and videos together changes the game and CapCut is here to lead the way. Thanks to its simple design and cool editing tricks its the easy pick for anyone wanting to overlay picture on video. And the best part is that its free. All in all CapCut got everything you need to make it happen. So why wait Jump into CapCut now and start creating videos that wow everyone. Download CapCut and let the fun begin
![How to make in CapCut’s Free AI Story Maker [Complete Guide]](https://capcatmodapk.pro/wp-content/uploads/2025/08/How-to-Use-14-1-768x432.png)